Free Preparation Discussions
SAP C_S4CPB Exam - Topic 1 Question 2 Discussion
Topic #: 1
SIMULATION
Create a Custom Launchpad Space and Page
Business Scenario
You are building a custom business role that will be assigned to all employees in the organization. The business role and its corresponding Launchpad Space and Page need to include the apps that have been granted through the business catalogs assigned to the business role to ensure employees have an easy time finding the relevant applications.
Note: In the task below, always replace ###### with the last 6 digits of your group number.
Note:
Make sure to use the EXACT names/values/spaces as they are listed in the task.
Even forgetting a space or a number will cause the validation of the task to fail and
be marked as incorrect.
Task:
Assign the business role to your user and save. Then refresh the browser and navigate home to verify the new Launchpad Space and tiles are visible.
Objective
The purpose of this task is to assign the newly created custom all-employee business role to your own business user, save the assignment, refresh the browser, and then verify that the new Launchpad Space and its tiles are visible on the homepage.
This is the final verification step for the all-employee role and launchpad setup.
Business Scenario Explanation
In the previous tasks, you created and configured:
a new custom business role for all employees,
the required business catalogs,
a custom launchpad space,
a custom launchpad page,
and the employee self-service tiles:
Manage My Timesheet
Concur Travel Expense
However, even if all of that is configured correctly, you still will not see the new page and tiles on your homepage until the custom role is assigned to your own business user.
This task connects the configuration to your user and verifies the final end-user result.
Important Notes
Always replace ###### with the last 6 digits of your group number.
Use the exact business role ID.
Save the user after adding the role.
Refresh the browser after saving.
Then navigate back to Home and confirm the space/page/tiles are visible.
Required Business Role
Assign the custom all-employee role created earlier:
Business Role ID: Z_EMPLOYEES_ALL_######
Business Role Description: All Employee Role ######
Example
If your suffix is 000013, the role is:
Z_EMPLOYEES_ALL_000013
Detailed Step-by-Step Procedure
Step 1: Open the app ''Maintain Business Users''
From the SAP S/4HANA Cloud launchpad:
Log in to SAP S/4HANA Cloud.
Search for:
Maintain Business Users
Open the app.
Explanation
This app is used to assign business roles to users.
The launchpad space and tiles will only become visible after the custom role is assigned to your own user.
Step 2: Search for your own business user
In Maintain Business Users:
Enter your own user name or business user ID in the search field.
Click Go.
Explanation
You must assign the role to your own user because you are the one who will verify the launchpad result on the homepage.
Step 3: Open your user record
From the search results:
Click your user entry.
Open the user details page.
Explanation
This opens the maintenance page where assigned business roles can be reviewed and changed.
Step 4: Switch to Edit mode
On the business user page:
Click Edit
Explanation
Without edit mode, the role assignment list is display-only.
Step 5: Open the ''Assigned Business Roles'' tab
Inside the user record:
Click:
Assigned Business Roles
Explanation
This tab contains the list of all business roles currently assigned to your user and is the correct place to add the all-employee role.
Step 6: Click Add
In the Assigned Business Roles section:
Click Add
This opens the popup:
Add Business Roles
Explanation
This popup allows you to search for and assign the custom all-employee role.
Step 7: Search for the custom all-employee role
In the Add Business Roles popup:
In the business role search field, enter:
Z_EMPLOYEES_ALL_######
Click Go
Select the role:
Z_EMPLOYEES_ALL_######
All Employee Role ######
Example
If your suffix is 000013, search for:
Z_EMPLOYEES_ALL_000013
Explanation
This is the custom role created in the earlier launchpad/employee-role tasks.
It contains the launchpad space, catalogs, and page content that must now become visible to your user.
Step 8: Add the role
After selecting the role:
Click OK or Apply
Explanation
This adds the role to your user in draft mode.
Step 9: Save the business user
Back on the business user page:
Click Save
Explanation
This is a mandatory step.
Without saving, the role assignment is not finalized, and the new launchpad content will not appear for your user.
Step 10: Confirm the role assignment
After saving, verify that your assigned roles list includes:
Z_EMPLOYEES_ALL_######
All Employee Role ######
Explanation
This confirms that the role is now officially assigned to your user.
Step 11: Refresh the browser
After saving:
Refresh the browser completely
Explanation
SAP launchpad content is often cached in the current session.
A browser refresh ensures the newly assigned role content is loaded.
Step 12: Navigate back to Home
After refreshing:
Return to Home
Explanation
The role's launchpad space and page must be verified from the end-user homepage, not only from configuration apps.
Step 13: Open the page / launchpad tab
On the homepage, look for the custom page/tab that contains the employee content.
In your run, the visible page was:
General
Explanation
The launchpad page created earlier was titled General, so that is the page you should open to verify the result.
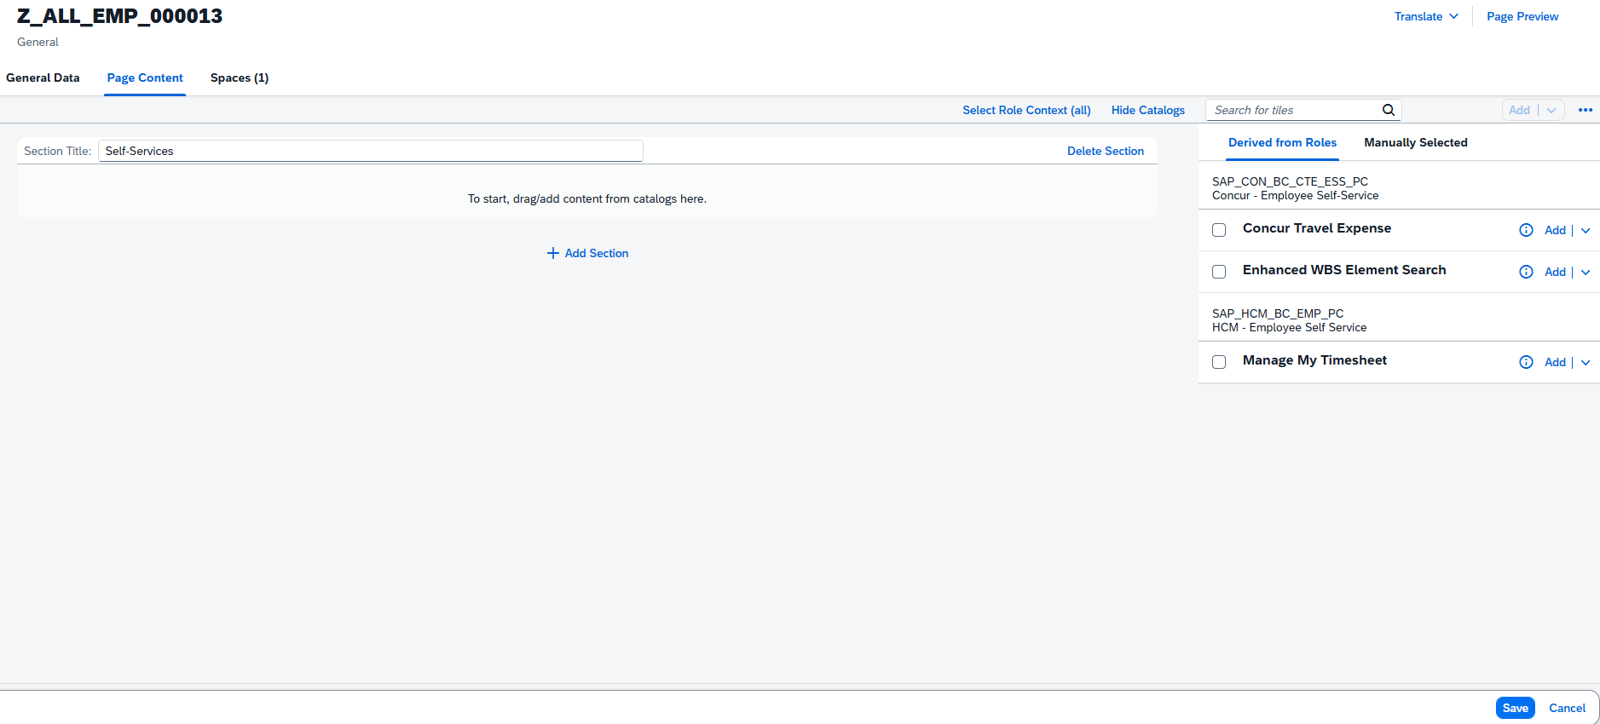
Step 14: Verify the section title
On the page, confirm that you can see the section:
Self-Services
Explanation
This was the section title created in the earlier page-content maintenance task.
Step 15: Verify the tiles
Under the Self-Services section, confirm that both tiles are visible:
Concur Travel Expense
Manage My Timesheet
Explanation
These are the two required employee self-service tiles added to the page in the previous task.
Seeing both of them confirms that:
the catalogs were assigned correctly,
the launchpad page was maintained correctly,
the business role was assigned correctly,
and the browser refresh loaded the new content successfully.
Expected Result
After completing this task successfully:
your own user has the custom business role assigned,
the role is saved successfully,
after browser refresh the launchpad updates,
the homepage shows the new launchpad page,
the Self-Services section is visible,
and the tiles Concur Travel Expense and Manage My Timesheet are visible.
Currently there are no comments in this discussion, be the first to comment!